It's Thanksgiving all across America today, even in the Amazing Junkyard of Wonderful Stuff. Handy Dan shows you a really nice tradition that you and your family can start this year. It's called the Thanks Gobbler and it's a lovely way to share what you're truly thankful for. Take a look!
Step 1: Gather your supplies
You only need to find a few common items you probably have around the house to make your Thanks Gobbler.
- Empty tissue box
- Paint
- Construction paper
- Piece of thin cardboard
- Googly eyes
- Marker
- Scissors
- Glue stick
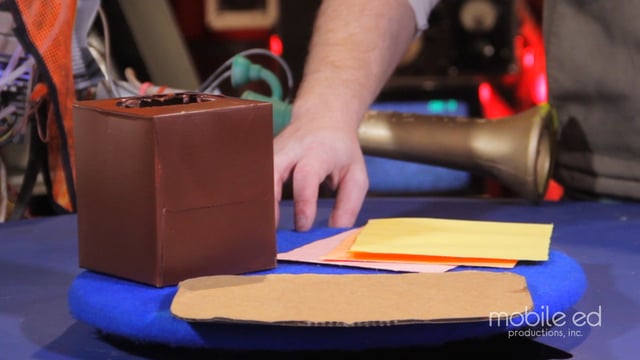
Step 2: Make the turkey's body and head
Your Thanks Gobbler will end up looking like a cute turkey. It will be made of several pieces: the body, the feathers, and the head. Each piece is made of a different material.
First, paint the tissue paper box your favorite shade of brown. This will act as the turkey's body.
Next, let's make the turkey's neck and head! Take your marker and your piece of thin cardboard and draw a long peanut-shape on it. Then, cut it out!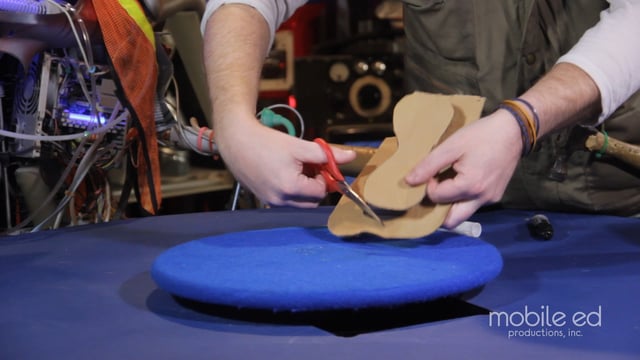
The turkey needs a face, though, so that's where the googly eyes come in. Stick a couple of those on one end of your peanut with your glue stick.
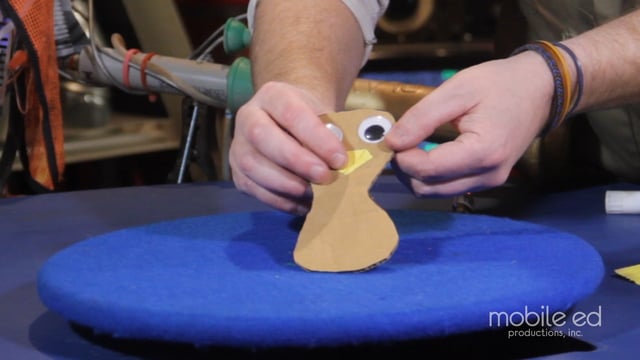
Then, for the beak, cut out a rectangle of yellow construction paper, fold it in half diagonally, and glue that onto the turkey's face.
Step 3: Make the feathers
Every turkey has a plume of colorful feathers, right? So does yours! To make some, place your hand on a piece of construction paper and trace it with your marker. Then, cut that out!
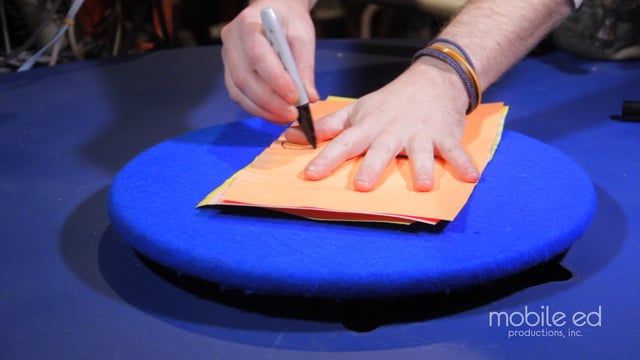
This is a great way to make some colored turkey feathers. Use festive colors like red, orange and yellow.
To make your Thanks Gobbler extra special, have everyone in your family trace their hands, so everyone is a part of the tradition from the beginning.
Step 4: Assemble the pieces
Now all you have to do is put the pieces together!
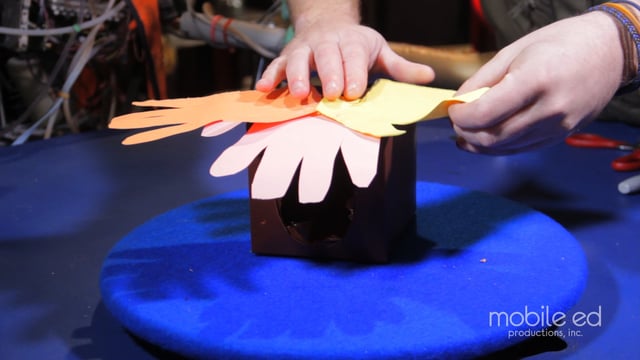
Use your glue stick and attach the head to the front of the tissue box and the feathers to the back. Keep the opening in the tissue box facing upwards so it can hold your special thank notes. The notes can be anything - even just some scrap construction paper.
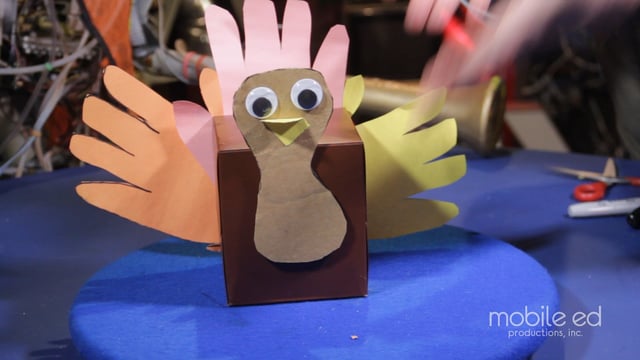
Step 5: What are you thankful for? Write it down!
Now that your Thanks Gobbler is all put together, you need to make some blank notes. Then, have everyone write down what you are thankful on the note, then fold it up and put it in the Gobbler.
The idea is to write down your thanks in secret. And write as many notes as you want!
Then, later in the day, you can empty out the gobbler and read what everyone is thankful for.
Have a happy Thanksgiving, everyone!
Check back again for more do-it-yourself projects from Handy Dan the Junkyard Man and Mobile Ed Productions!
If you like DIY experiments like these, you should see the kinds of spectacular demonstrations we bring to schools with our live school assembly presentations. Take a look at STEAM Museum, The Magic of Science, Physics is Fun, Forces and Motion and Crime Scene Science, each full of interactive demonstrations that kids love.


